Руководство по шахтерству
Горнодобывающая промышленность — это хлеб с маслом отдела снабжения. Помимо экспорта ящиков и манифестов, корабль полагается на Старательные бригады, который добывают и обрабатывают достаточно минералов, чтобы получить эти приятные, дополнительные кредиты. Учитывая, что по знаниям старатель имеет опыт, это относительно безопасная работа; но каждый шахтер должен быть внимательным и осторожным, чтобы они не стали пиршеством для голодной ксенофауны.
Оборудование
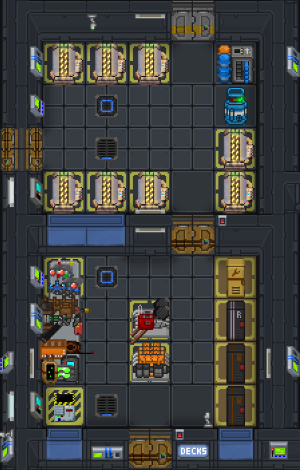
Хранилище вашего оборудования находится в горнодобывающей cхроне, в кормовой части ангара (на лётной — четвёртой палубе). Здесь есть два шкафчика, а также стол с другими разнообразными инструментами, которые вам рекомендуется взять с собой.
Оборудование в шкафчике
| Оборудование | Иконка | Описание |
|---|---|---|
| Разгрузочный Жилет | Если надеть его на свой комбинезон, у вас появятся три дополнительных места для хранения вещей. | |
| Газовый Анализатор | Нажав на землю вокруг вас, вы получите информацию об атмосфере вокруг вас. Учитывая, что некоторые планеты чрезвычайно горячие или холодные, имеют токсичную для человека атмосферу или даже легко воспламеняются, лучше всего быть осведомленным. | |
| Шахтерская сумка | Нажмите на плитку, держа ее в руке, чтобы собрать всю руду с этой плитки. Вы также можете положить его в ящик с рудой, когда ваша сумка заполнится. | |
| Лампа | Портативный источник света. | |
| Ручная дрель | Зайдите в сторону породы или нажмите на неё, чтобы пробурить небеса. | |
| Оптический Мезоновый сенcер | Позволяет видеть сквозь стены с зеленым оттенком. Абсолютно необходим для добычи полезных ископаемых, поскольку вы можете видеть всю руду, которая находится на вашем экране. | |
| Оптический Материальный сенcер | Позволяет видеть только объекты через стены. | |
| Детектор Руды | Нажмите на землю, удерживая ее, чтобы получить минеральное исследование плитки. Отличный инструмент для определения места установки буровой головки. Вы также можете распечатать данные о руде и вернуть и потом отравить через карго, чтобы получить кредиты, но их будет очень мало. | |
| Пояс с инструментами | Для хранения инструментов, естественно. Тут есть всё, кроме мултитула. | |
| Коротковолновое радио | За то, что остаетесь на связи, зовете на помощь и просто болтаете с командой или с самим собой. |
В РНД, вы можете получить модернизированные инструменты на относительно ранних стадиях матричного процессоры, такие как улучшенный бур или плазменный резак. Вы также можете попросить модернизированные микролазеры, улучшенный контейнеры и улучшенные конденсаторы, чтобы сделать большую дрель более эффективной. И не забудьте про улучшенные батарейки.
Оборудования для ВКД.
К востоку от горной подготовки находится помещение для выхода в открытый космос. Разблокируйте и откройте хранилище и вытащите все. Если вы принадлежите к другому виду, чем человек, используйте циклер шахтерского костюма в южном углу комнаты, чтобы отрегулировать свой костюм. (Примечание: циклер костюма можно разблокировать, просто нажав «разблокировать блок».) Более подробную информацию об оборудовании для выхода в открытый космос см.Гайд по ВКД.
Ваш кислородный баллон, который поставляется в хранилище, по умолчанию будет заполнен только наполовину. Обязательно заправьте его в кислородный баллон.
Если вы хотите быть уверенным, что у вас не закончится воздух, возьмите второй кислородный баллон из резервуара для хранения над канистрой и тоже наполните его..
Экспедиционное хранилище
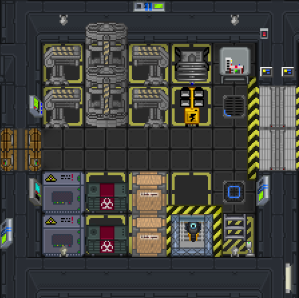
Рядом с отсеком для ВКД есть ангара в котором находится склад. В нём хранится ваша большая дрель и другое разнообразное оборудование.
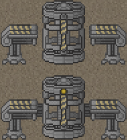
- Детали горного бура: Невозможно автоматически добывать руду из одного места. Но вот стационарный бур вам поможет! Для правильной работы вам понадобится буровая головка и две скобы по бокам. Он также работают на аккумуляторах, а это значит, что неплохо будет приобрести еще парочку.
- Ящик для руды: Бесконечный ящик для руды; вам понадобится только один, если только другой старатель не захочет тащить его за собой, пока они ведут добычу самостоятельно. Вы можете высыпать в него содержимое сумки и большого бура.
- Прожекторы: Может осветить большую территорию вокруг вас, хотя мезоны у вас уже должны быть.
- Индивидуальный Комплекс Самообеспечения: Жесткий костюм, предназначенный для опытных старателей. Чтобы экипировать его, поместите его в слот рюкзака и выберите вкладку «Hardsuit», чтобы увидеть варианты его активации. В него встроены мезоны и плазменный резак, но он ограничивает ваше зрение, и вы не можете пользоваться биноклем, пока носите его. Более подробную информацию о работе жесткого костюма см. в раздел.Hardsuits.
Подготовка
В начале раунда рекомендуется запросить у экипажа мостика или квартирмейстера показания датчиков cо сканера. Это даст вам список мест, куда вы можете пойти вместе с пеленгом. Пеленг работает на 360 градусов (как транспортир), чтобы указать вам, в каком направлении лететь, чтобы добраться до указанного места.
Ваша навигационная консоль также сообщит вам координаты (x-y) места выезда в начале раунда.
Команда или один?
У вас есть два варианта отправиться на задание: вы можете использовать свой доступ к коммуникациям и свзяатся с ЛЭК (Лидером Экспедиционного Корпуса), чтобы скоординировать свои действия c ним или пилотом шаттла, отправляясь на "Харон", или отправиться самостоятельно или с коллегами-разведчиками на General Utility Pod, или Гуппи. У обоих вариантов есть свои плюсы и минусы: у вас будет подкрепление в виде команды, если вы отправитесь с Экспедиторами, но вы будете сами себе хозяином и полетите на своих условиях, если отправитесь в одиночку.
Going it alone
If you decide to go on your own, or there's no exploration team to go with, talk to the supply team about getting the GUP fueled and fully aired. The GUP uses CO2 for moving on the overmap, and hydrogen for making transitions between the Torch, a planet, or open space. The amount of air you have in the ship indicates how much you can cycle the GUP's airlock and how much of a breathable atmosphere inside the ship you have.
You can check how much CO2 you have by checking the orange-screened thruster console. The GUP does not need much thrust, and as such it's advised to lower the percentage of thrust on the console so you use less fuel (it can go as low as 10% thrust and still beat the Torch in a race, depending on circumstances).
The GUP's airlock (and how to use it)
The GUP has one door (and one back hatch), and as such the entire ship acts like a large airlock. To properly cycle the GUP and learn how not to inhale chlorine, follow these simple instructions.
- On the right side of the GUP, there is an Airlock Controller. Click it, and it will bring up a menu.
- On the menu, you have three options; Purge Air, Equalize With Exterior, and Hold. There is also a meter that shows the air pressure of the GUP.
- Turn on your internals.
- Turn on your magboots.
- Select Purge Air.
- The atmosphere in the GUP will be drained. Once the meter reaches 0-5 kPa, select Hold. This will keep the atmosphere at whatever enters it.
- Unlatch the doors with Override door safeties.
- Exit the GUP, and go mining.
- Once you return to the GUP and are ready to go back to the Torch, head to the controller and select Purge Air again. This will drain all of the planet's potentially toxic air.
- Wait until the meter says the atmosphere is at 0kPa again.
- Under the seat next to where your air canister would be hooked up, there is a valve. This controls the air supply to the ship. Click it to open it.
- Wait until the pressure is livable (90-101kPa, roughly), then close the valve again.
Congratulations! You can now head back to the hangar without Engineering wanting to skin you alive for gassing the ship.
Extra safety tips
- Keep track of your internals under the 'Status' tab. If your tank pressure is too low, it might be time to swap out your oxygen or return to the ship.
- The supply warehouse has medical supplies in a cabinet nearby the stairs. It's a good idea to take some supplies in case you're severely injured, to hold out until medical can reach you.
- Duct tape can patch up suit breaches.
- Always keep your shortwave radio and relay positioning device on hand.
- Never be afraid to ask for help. Both the GUP and the Charon have long-range holopads you can use to contact the supply office or the bridge; just step on the pad and click it to bring up who you want to call.
- The plasma cutter can ignite a flammable atmosphere. Be careful where you use it.
Mining
Mechanically, mining is simple. To mine ore, click on a rock that has a mineral vein in it; this will bring a little progress bar up. You can click on more than one vein at a time. Once the rock is mined, click on the tile with your mining satchel to pick up the ore. When your satchel is full, empty it into an ore box.
Mining Drill 101
The mining drill, as seen to your left, can be bulky and requires some setup to use properly. However, it can be a very powerful tool, and provides a consistent source of minerals.
Setting it up
To set the drill up, you will need a wrench and possibly a screwdriver.
- Use the ore detector to find a good spot for the drill. The higher the number, the better the ore.
- Drag the head where you scanned, and wrench it together as you found it in storage; head in the middle, braces on either side.
- Click the head with an empty hand.
- The drill will start up with an animation.
Usage and Maintenance
If there is a pulsing green light on the head, it means that the drill is now working! Occasionally, however, it will flash a red light and stop. Click it with an empty hand to restart it and see the error message:
- Resources depleted: Wrench the braces and move the drill elsewhere.
- Insufficient storage space: The drill is full. Put an ore box above or below the head, right-click the head and select "Unload Drill".
- The drill is unpowered: It lacks a (charged) power cell. Click the head with a screwdriver to open its panel, click on it with an empty hand to remove the power cell. Take a charged cell into your hands, click the head to insert it, then use a screwdriver to close it. Click the head again to re-activate it.
Refining
After a successful mining expedition, ideally, you will come back with a large amount of multiple different ores. In order for them to be worth anything or used in any projects on the Torch, you must refine them using the refinery on the aft (east) edge of the hangar.
 Put the ore box one tile to the left of the "unloading machine".
 Click the "mining conveyor" below the box to send the ores into the "material processor".
 Select the "mining console" to operate the furnace.
To alloy/alloying means to combine multiple ores to make products (see below).
Supply will mostly be using your ore to gain credits. If Research or Robotics is active this shift, they can also send them some materials such as uranium, phoron, silver, etc.
IMPORTANT: If you don't select the right method for each ore, they will turn out to be useless slag.
| Processing Method | |||
|---|---|---|---|
| Name (Raw Ore) | Smelting | Compressing | Alloying |
| Rough Diamond | – | Diamond Gem | – |
| Hematite | Iron Ingot | – | Steel Sheet |
| Raw Hydrogen | Tritium Ingot | Metallic Hydrogen Sheet | – |
| Native Gold | Gold Ingot | – | – |
| Native Siler | Silver Ingot | – | – |
| Phoron | – | Phoron Crystal | – |
| Pitchblende | Uranium Sheet | Pitchblende Brick | – |
| Graphene | Plastic Sheet | Graphene Sheet | Steel Sheet |
| Raw Platinum | Platinum Ingot | Osmium Ingot | Plasteel Sheet |
| Bauxite | Aluminium Sheet | Bauxite Brick | – |
| Sand | Glass Sheet | Sandstone | Borosilicate Glass Sheet |
| Quartz | – | Quartz | – |
| Pyrite | – | Pyrite | – |
| Spodumene | – | Spodumene | – |
| Cinnabar | – | Cinnabar | – |
| Phosphorite | – | Phosphorite | – |
| Rock Salt | – | Rock Salt | – |
| Potash | – | Potash | – |
| Tetrahedrite | Copper | – | – |
| Rutile | Titanium | – | – |
| Borax | – | Borax Brick | Borosilicate Glass Sheet |
| Alloying | ||
|---|---|---|
| Result | Ingredient | Ingredient |
| Osmium-Carbide Plasteel Sheet | 5 Plasteel | 3 Osmium |
| Plasteel Sheet | 1 Platnium | 2 Steel |
| Borosilicate Glass Sheet | 1 Borax | 2 Sand |
| Steel Sheet | 1 Graphene | 1 Hematite |
| Guide for New Players ∙ Map of the SEV Torch ∙ Character Creation ∙ Roleplaying ∙ Controls ∙ User Interface ∙ Skills ∙ How to Sol Gov ∙ Paperwork | |
| Alert Procedure ∙ General Regulations ∙ SCG Law ∙ Sol Code of Uniform Justice ∙ Standard Operating Procedure ∙ Uniform Guide ∙ Court Martial SOP | |
| EVA and Internals ∙ Exploration ∙ Mining ∙ Ships ∙ Supply ∙ OFD | |
| Chemistry ∙ Medicine ∙ Surgery | |
| Atmospherics ∙ Computing ∙ Construction ∙ Hacking ∙ Robotics ∙ SMES Units ∙ Solars ∙ Supermatter ∙ Telecommunications ∙ R-UST | |
| Anomalies ∙ Integrated Circuits ∙ Research and Development ∙ Xenoarchaeology ∙ Xenobiology ∙ Xenobotany | |
| Combat ∙ Forensics | |
| Cooking ∙ Drinks ∙ Hydroponics | |
| Antagonist Uplinks ∙ Psionics | |
| Appeals and Complaints ∙ Coding with NanoUI ∙ Server Moderation ∙ How to Apply: Moderator ∙ How to Apply: Species Apps ∙ Wiki Contribution |


