Руководство по шахтерству: различия между версиями
imported>Rootoo (Adds images) |
imported>Rootoo Нет описания правки |
||
| Строка 282: | Строка 282: | ||
|1 Hematite | |1 Hematite | ||
|} | |} | ||
---- | |||
{{Navbox Guides}} | |||
[[Category:Supply Guides]][[Category:Guides]] | [[Category:Supply Guides]][[Category:Guides]] | ||
Версия от 16:29, 26 апреля 2023
Mining is the Supply department's bread and butter; apart from exporting crates and manifests, the ship relies on the Prospector to mine and process enough minerals in order to obtain those sweet, sweet extra credits. Given that in-lore the Prospector is assumed to be experienced, this is a relatively safe job; but every miner must keep their wits about them and be careful, lest they be a feast for hungry xenofauna.
Equipment
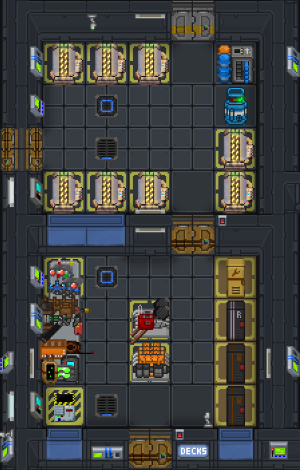
Your equipment storage is in Mining Prep, to the aft of the Hangar (on Deck Five). There are two lockers, plus a table of other assorted tools you'd be advised to pick up.
Locker Equipment
| Equipment | Icon | Description |
|---|---|---|
| Webbing Vest | Equipping this on your jumpsuit will provide you with three extra storage slots. | |
| Gas Analyzer | Clicking on the ground around you will provide information about the atmosphere around you. Considering some planets are extremely hot, cold, have an atmosphere toxic to humans, or are even flammable, it's best to go in knowledgeable. You also have a built-in gas scanner in your PDA. | |
| Mining Satchel | Click on a tile with it in your hand to pick up every ore on that tile. You can also empty it into an ore box once your satchel is full. | |
| Lantern | Portable light source. | |
| Mining Drill | Walk into rocks or click on them to drill through the rock. | |
| Optical Meson Scanner | Lets you see through walls with a green tint. An absolute must for mining, as you can see all of the ore that is on your screen. | |
| Optical Material Scanner | Lets you see only objects through walls. | |
| Ore Detector | Click on the ground while holding this to obtain a mineral survey of the tile. An excellent tool for figuring out where to set the mining drill head. You can also print out the ore surveys and give them back to supply to gain credits, but it's very little. | |
| Tool Belt | For holding tools, naturally. Some tools, like screwdrivers and an upgraded welder, spawn on the table in Mining Prep. | |
| Shortwave Radio | For staying in contact, calling out for help, and just chatting with your team, or yourself. Essential. | |
| Global Positioning System | This will show your coordinates (written like x-y-z) on your status tab if the RPD is in your pocket. This is essential for figuring out where your ship is parked and where you are at the moment. |
Research & Development can get you upgraded tools relatively early in the matrix process, such as advanced mining drills or plasma cutters. You can also ask for upgraded micro-lasers, matter bins, and power cells to make the big drill more efficient.
EVA Equipment
North of Mining Prep is the EVA room. Unlock and open a storage unit, and take out everything. If you are a different species than Human, use the Mining Suit Cycler in the southwest corner of the room to adjust your suit. (Note: The suit cycler can just be unlocked by pressing 'unlock unit'.) For more details on EVA equipment, see Guide to EVA and Internals.
Your oxygen tank that comes in a storage unit will only be half-full by default. Make sure to fill it at an oxygen canister.
If you want to make sure you don't run out of air, take a second oxygen tank from the Tank Storage Unit above the canister and fill it too.
Expedition Storage
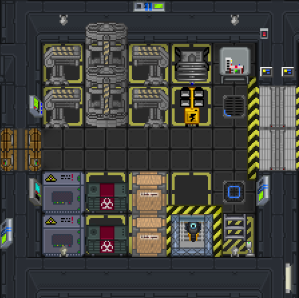
To the fore of the hangar is storage that contains your big drill and other assorted equipment (mostly for the exploration team).
- Mining Drill Parts: Can mine ore automatically from one spot. You need the drill head and two braces for it to work properly. They also run on power cells, meaning it's a good idea to grab a couple extra.
- Ore Boxes: An infinite ore storage unit; you should only need one, unless another prospector wants to drag one behind them while they mine on their own. You can empty the contents of your satchel and the big drill into it.
- Floodlights: Can illuminate a larger area around you, though you should have mesons already.
- Industrial Suit Control Module: A hardsuit designed for experienced Prospectors. To equip it, put it in your backpack slot and select the 'Hardsuit' tab to see options for activating it. It comes with built-in mesons and a plasma cutter, but it limits your vision and you can't use binoculars while you're wearing it. See Hardsuits for more details on hardsuit operation.
Preparing an Expedition
At the start of the round, it's advised to ask the bridge crew or the Deck Chief for the Torch's sensor readings. These will give you a list of locations you can go to alongside a bearing. A bearing works on a 360 degree measurement (like a protractor) to tell you which direction to fly to get to said away site.
Your navigation console will also tell you the coordinates (x-y) of an away site at round start.
Team or alone?
You have two options when going out on a mission; you can use your access to Exploration comms (:y) to coordinate with the Pathfinder or Shuttle Pilot about heading out on the Charon, or you can head out on your own or with a fellow prospector on the General Utility Pod, or GUP. Both have their own pros and cons; you'll have backup in the form of a team when going with Exploration, but you'll get to be your own boss and fly on your own terms when heading out by yourself.
Going it alone
If you decide to go on your own, or there's no exploration team to go with, talk to the supply team about getting the GUP fueled and fully aired. The GUP uses CO2 for moving on the overmap, and hydrogen for making transitions between the Torch, a planet, or open space. The amount of air you have in the ship indicates how much you can cycle the GUP's airlock and how much of a breathable atmosphere inside the ship you have.
You can check how much CO2 you have by checking the orange-screened thruster console. The GUP does not need much thrust, and as such it's advised to lower the percentage of thrust on the console so you use less fuel (it can go as low as 10% thrust and still beat the Torch in a race, depending on circumstances).
The GUP's airlock (and how to use it)
The GUP has one door (and one back hatch), and as such the entire ship acts like a large airlock. To properly cycle the GUP and learn how not to inhale chlorine, follow these simple instructions.
- On the right side of the GUP, there is an Airlock Controller. Click it, and it will bring up a menu.
- On the menu, you have three options; Purge Air, Equalize With Exterior, and Hold. There is also a meter that shows the air pressure of the GUP.
- Turn on your internals.
- Turn on your magboots.
- Select Purge Air.
- The atmosphere in the GUP will be drained. Once the meter reaches 0-5 kPa, select Hold. This will keep the atmosphere at whatever enters it.
- Unlatch the doors with Override door safeties.
- Exit the GUP, and go mining.
- Once you return to the GUP and are ready to go back to the Torch, head to the controller and select Purge Air again. This will drain all of the planet's potentially toxic air.
- Wait until the meter says the atmosphere is at 0kPa again.
- Under the seat next to where your air canister would be hooked up, there is a valve. This controls the air supply to the ship. Click it to open it.
- Wait until the pressure is livable (90-101kPa, roughly), then close the valve again.
Congratulations! You can now head back to the hangar without Engineering wanting to skin you alive for gassing the ship.
Extra safety tips
- Keep track of your internals under the 'Status' tab. If your tank pressure is too low, it might be time to swap out your oxygen or return to the ship.
- The supply warehouse has medical supplies in a cabinet nearby the stairs. It's a good idea to take some supplies in case you're severely injured, to hold out until medical can reach you.
- Duct tape can patch up suit breaches.
- Always keep your shortwave radio and relay positioning device on hand.
- Never be afraid to ask for help. Both the GUP and the Charon have long-range holopads you can use to contact the supply office or the bridge; just step on the pad and click it to bring up who you want to call.
- The plasma cutter can ignite a flammable atmosphere. Be careful where you use it.
Mining
Mechanically, mining is simple. To mine ore, click on a rock that has a mineral vein in it; this will bring a little progress bar up. You can click on more than one vein at a time. Once the rock is mined, click on the tile with your mining satchel to pick up the ore. When your satchel is full, empty it into an ore box.
Mining Drill 101
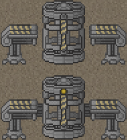
The mining drill, as seen to your left, can be bulky and requires some setup to use properly. However, it can be a very powerful tool, and provides a consistent source of minerals.
Setting it up
To set the drill up, you will need a wrench and possibly a screwdriver.
- Use the ore detector to find a good spot for the drill. The higher the number, the better the ore.
- Drag the head where you scanned, and wrench it together as you found it in storage; head in the middle, braces on either side.
- Click the head with an empty hand.
- The drill will start up with an animation.
Usage and Maintenance
If there is a pulsing green light on the head, it means that the drill is now working! Occasionally, however, it will flash a red light and stop. Click it with an empty hand to restart it and see the error message:
- Resources depleted: Wrench the braces and move the drill elsewhere.
- Insufficient storage space: The drill is full. Put an ore box above or below the head, right-click the head and select "Unload Drill".
- The drill is unpowered: It lacks a (charged) power cell. Click the head with a screwdriver to open its panel, click on it with an empty hand to remove the power cell. Take a charged cell into your hands, click the head to insert it, then use a screwdriver to close it. Click the head again to re-activate it.
Refining
After a successful mining expedition, ideally, you will come back with a large amount of multiple different ores. In order for them to be worth anything or used in any projects on the Torch, you must refine them using the refinery on the aft (east) edge of the hangar.
 Put the ore box one tile to the left of the "unloading machine".
 Click the "mining conveyor" below the box to send the ores into the "material processor".
 Select the "mining console" to operate the furnace.
To alloy/alloying means to combine multiple ores to make products (see below).
Supply will mostly be using your ore to gain credits. If Research or Robotics is active this shift, they can also send them some materials such as uranium, phoron, silver, etc.
IMPORTANT: If you don't select the right method for each ore, they will turn out to be useless slag.
| Processing Method | |||
|---|---|---|---|
| Name (Raw Ore) | Smelting | Compressing | Alloying |
| Rough Diamond | – | Diamond Gem | – |
| Hematite | Iron Ingot | – | Steel Sheet |
| Raw Hydrogen | Tritium Ingot | Metallic Hydrogen Sheet | – |
| Native Gold | Gold Ingot | – | – |
| Native Siler | Silver Ingot | – | – |
| Phoron | – | Phoron Crystal | – |
| Pitchblende | Uranium Sheet | Pitchblende Brick | – |
| Graphene | Plastic Sheet | Graphene Sheet | Steel Sheet |
| Raw Platinum | Platinum Ingot | Osmium Ingot | Plasteel Sheet |
| Bauxite | Aluminium Sheet | Bauxite Brick | – |
| Sand | Glass Sheet | Sandstone | Borosilicate Glass Sheet |
| Quartz | – | Quartz | – |
| Pyrite | – | Pyrite | – |
| Spodumene | – | Spodumene | – |
| Cinnabar | – | Cinnabar | – |
| Phosphorite | – | Phosphorite | – |
| Rock Salt | – | Rock Salt | – |
| Potash | – | Potash | – |
| Tetrahedrite | Copper | – | – |
| Rutile | Titanium | – | – |
| Borax | – | Borax Brick | Borosilicate Glass Sheet |
| Alloying | ||
|---|---|---|
| Result | Ingredient | Ingredient |
| Osmium-Carbide Plasteel Sheet | 5 Plasteel | 3 Osmium |
| Plasteel Sheet | 1 Platnium | 2 Steel |
| Borosilicate Glass Sheet | 1 Borax | 2 Sand |
| Steel Sheet | 1 Graphene | 1 Hematite |
| Guide for New Players ∙ Map of the SEV Torch ∙ Character Creation ∙ Roleplaying ∙ Controls ∙ User Interface ∙ Skills ∙ How to Sol Gov ∙ Paperwork | |
| Alert Procedure ∙ General Regulations ∙ SCG Law ∙ Sol Code of Uniform Justice ∙ Standard Operating Procedure ∙ Uniform Guide ∙ Court Martial SOP | |
| EVA and Internals ∙ Exploration ∙ Mining ∙ Ships ∙ Supply ∙ OFD | |
| Chemistry ∙ Medicine ∙ Surgery | |
| Atmospherics ∙ Computing ∙ Construction ∙ Hacking ∙ Robotics ∙ SMES Units ∙ Solars ∙ Supermatter ∙ Telecommunications ∙ R-UST | |
| Anomalies ∙ Integrated Circuits ∙ Research and Development ∙ Xenoarchaeology ∙ Xenobiology ∙ Xenobotany | |
| Combat ∙ Forensics | |
| Cooking ∙ Drinks ∙ Hydroponics | |
| Antagonist Uplinks ∙ Psionics | |
| Appeals and Complaints ∙ Coding with NanoUI ∙ Server Moderation ∙ How to Apply: Moderator ∙ How to Apply: Species Apps ∙ Wiki Contribution |


